Ten steps to creating and updating a new site logo
1. Once you’ve created your site, you can create a custom logo. One option is to use the logo generator. You can also create your own logo through other apps such as Photoshop. If you prefer not to use the logo generator and just want to replace the current logo, skip to step 7.
2. To use the logo generator, type in your site name and click the “Download SVG” button below the “Without wordmark” option.
3. Navigate to the location your browser saved it to and rename the file <sitename>-logo.svg (e.g., biolab-logo.svg).

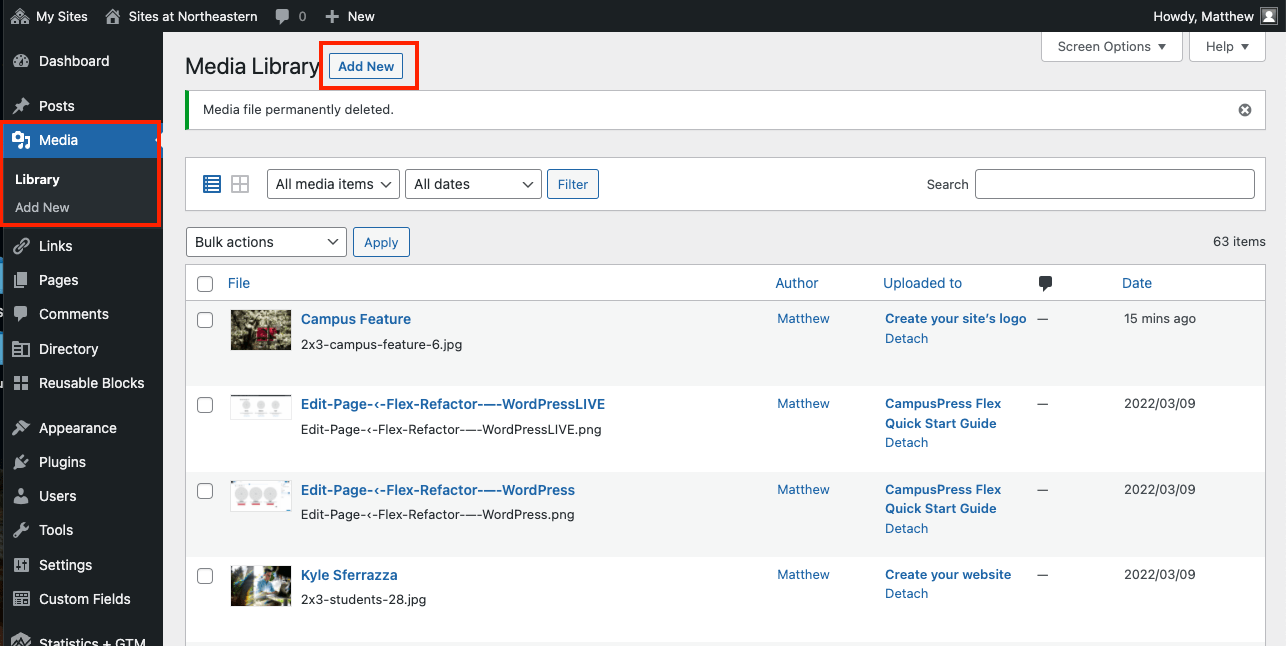
4. In your site’s dashboard, select Media Library.
5. Click the “Add New” button.
6. Drag and drop or select the saved logo file.
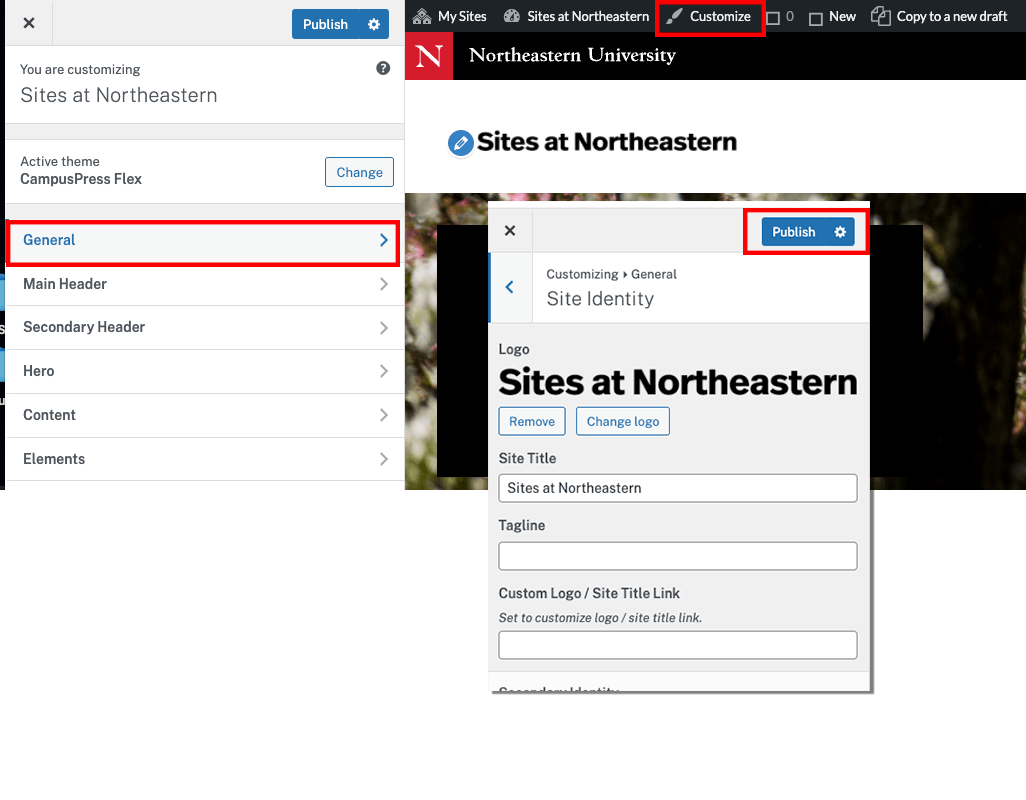
7. Log in to your site and then click the “Customize” link (with the paintbrush icon) in the top admin bar.
8. Click General, then Site Identity.
9. To use an image, click the “Change logo” button underneath the current logo and select an image either from your WordPress Media Library or upload a new image from your local machine. You can also use text as your logo, by clicking “Remove” under your current logo image, and then updating the “Site Title” which will be your new logo.
10. Select Publish to change your logo.